Creating an Amazon EC2

Creating an Amazon EC2 instance
An EC2 instance is nothing but a virtual server in Amazon Web Services terminology. It stands for Elastic Compute Cloud. It is a web service where an AWS subscriber can request and provision a compute server in AWS cloud.
- First Create an AWS account
- Login and access to AWS services.
Step 1) In this step,
- Login to your AWS account and go to the AWS Services tab at the top left corner.
- Here, you will see all of the AWS Services categorized as per their area viz. Compute, Storage, Database, etc. For creating an EC2 instance, we have to choose Computeà EC2 as in the next step.
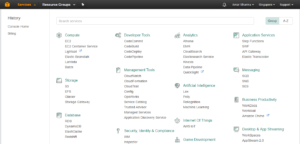
- Open all the services and click on EC2 under Compute services. This will launch the dashboard of EC2.
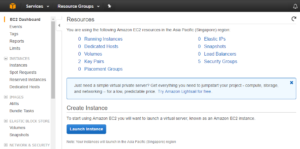
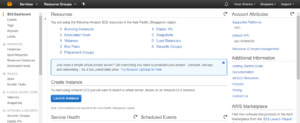
Here is the EC2 dashboard. Here you will get all the information in gist about the AWS EC2 resources running.
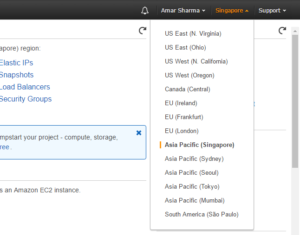
Step 2) On the top right corner of the EC2 dashboard, choose the AWS Region in which you want to provision the EC2 server.
Here we are selecting Asia Pacific (Singapore). AWS provides 10 Regions all over the globe.
Step 3) In this step
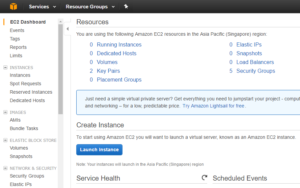
- Once your desired Region is selected, come back to the EC2 Dashboard.
- Click on ‘Launch Instance’ button in the section of Create Instance (as shown below).
Choose AMI
Step 4) In this step we will do,
- You will be asked to choose an AMI of your choice. (An AMI is an Amazon Machine Image. It is a template basically of an Operating System platform which you can use as a base to create your instance). Once you launch an EC2 instance from your preferred AMI, the instance will automatically be booted with the desired OS. (We will see more about AMIs in the coming part of the tutorial).
- Here we are choosing the default Amazon Linux (64 bit) AMI.

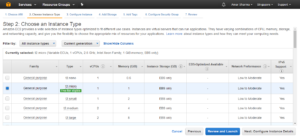
Choose Instance Types
Step 5) In the next step, you have to choose the type of instance you require based on your business needs.
- We will choose t2.micro instance type, which is a 1vCPU and 1GB memory server offered by AWS.
- Click on “Configure Instance Details” for further configurations
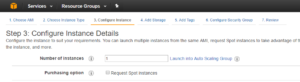
Configure Instance
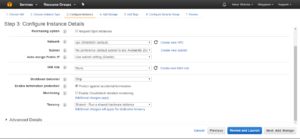
Step 6)
- No. of instances- you can provision up to 20 instances at a time. Here we are launching one instance.
- Under Purchasing Options, keep the option of ‘Request Spot Instances’ unchecked as of now. (This is done when we wish to launch Spot instances instead of on-demand ones.
Step 7) Next, we have to configure some basic networking details for our EC2 server.
- You have to decide here, in which VPC (Virtual Private Cloud) you want to launch your instance and under which subnets inside your VPC.
- Network section will give a list of VPCs available in our platform.
- Select an already existing VPC or you can create your own VPN by clicking onthe create new VPN link.
Here I have selected an default VPC where I want to launch my instance.
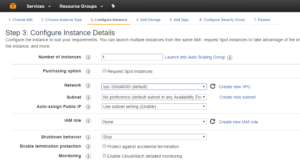
Step 8) In this step,
- A VPC consists of subnets, which are IP ranges that are separated for restricting access.
- Below,
- Under Subnets, you can choose the subnet where you want to place your instance.
- I have chosen an default existing public subnet.
- You can also create a new subnet in this by clicking on the Create new subnet link.

Step 9) In this step,
- You can choose if you want AWS to assign it an IP automatically, or you want to do it manually later. You can enable/ disable ‘Auto assign Public IP’ feature here likewise.
- Here we are going to assign this instance a static IP called as EIP (Elastic IP) later. So we keep this feature Enabled as of now.
Step 10) In this step,
- In the following step, keep the option of IAM role ‘None’ as of now.
- Shutdown Behavior – when you accidently shut down your instance, you surely don’t want it to be deleted but stopped.
- Here we are defining my shutdown behavior as Stop.

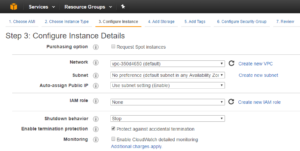
Step 11) In this step,
- In case, you have accidently terminated your instance, AWS has a layer of security mechanism. It will not delete your instance if you have enabled accidental termination protection.
- Here we are checking the option for further protecting our instance from accidental termination.

Step 12) In this step,
- Under Monitoring- you can enable Detailed Monitoring if your instance is a business critical instance. Here we have kept the option unchecked. AWS will always provide Basic monitoring on your instance free of cost.
- Under Tenancy- select the option if shared tenancy. If your application is a highly secure application, then you should go for dedicated capacity. AWS provides both options.
- Next,Click on ‘Add Storage’ to add data volumes to your instance in next step.
Add Storage
Step 13) In this step we do following things,
- In the Add Storage step, you’ll see that the instance has been automatically provisioned a General Purpose SSD root volume of 8GB. ( Maximum volume size we can give to a General Purpose volume is 16GB)
- You can change your volume size, add new volumes, change the volume type, etc.
- AWS provides 3 types of EBS volumes- Magnetic, General Purpose SSD, Provisioned IOPs. You can choose a volume type based on your application’s IOPs needs.
- Here we are selected the option General Purpose SSD (GP2).

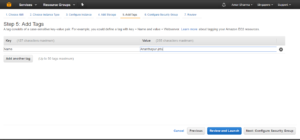
Tag Instance
Step 14) In this step
- you can tag your instance with a key-value pair. This gives visibility to the AWS account administrator when there are lot number of instances.
- The instances should be tagged based on their department, environment like Dev/SIT/Prod. Etc. this gives a clear view of the costing on the instances under one common tag.
- Here we have tagged the instance as a Ananthapur-jntu
- Go to configure Security Groups later
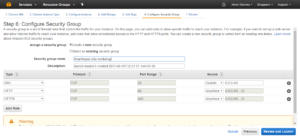
Configuring Security Groups
Step 15) In this next step of configuring Security Groups, you can restrict traffic on your instance ports. This is an added firewall mechanism provided by AWS apart from your instance’s OS firewall.
You can define open ports and IPs.
- Since our server is a webserver=, we will do following things
- Creating a new Security Group
- Naming our SG for easier reference
- Defining protocols which we want enabled on my instance
- Assigning IPs which are allowed to access our instance on the said protocols
- Once, the firewall rules are set- Review and launch
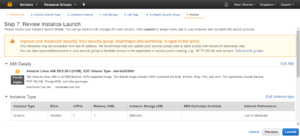
Review Instances
Step 16) In this step, we will review all our choices and parameters and go ahead to launch our instance.
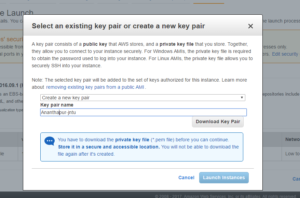
Step 17) In the next step you will be asked to create a key pair to login to you an instance. A key pair is a set of public-private keys.
AWS stores the private key in the instance, and you are asked to download the public key. Make sure you download the key and keep it safe and secured; if it is lost you cannot download it again.
- Create a new key pair
- Give a name to your key
- Download and save it in your secured folder
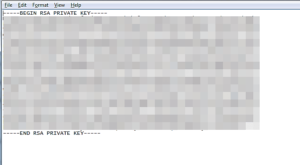
- When you download your key, you can open and have a look at your RSA private key.
Step 18) Once you are done downloading and saving your key, launch your instance.
- You can see the launch status meanwhile.

- You can also see the launch log.
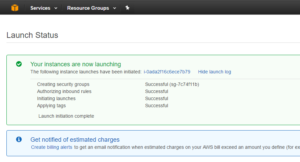
- After that click on the view instances button it will shows the your instance.
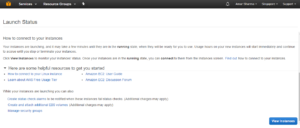
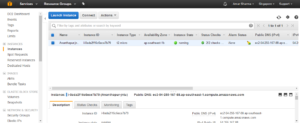
- Click on the ‘Instances’ option on the left pane where you can see the status of the instance as ‘Pending’ for a brief while.
- Once your instance is up and running, you can see its status as ‘Running’ now.
- Note that the instance has received a Private IP from the pool of AWS.
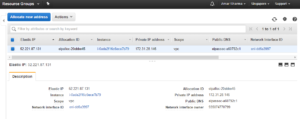
Creating a EIP and connecting to your instance
An EIP is a static public IP provided by AWS. It stands for Elastic IP. Normally when you create an instance, it will receive a public IP from the AWS’s pool automatically. If you stop/reboot your instance, this public IP will change- it’dynamic. In order for your application to have a static IP from where you can connect via public networks, you can use an EIP.
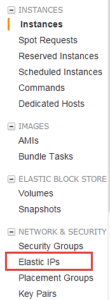
Step 19) On the left pane of EC2 Dashboard, you can go to ‘Elastic IPs’ as shown below.
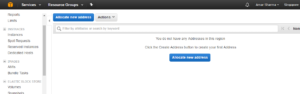
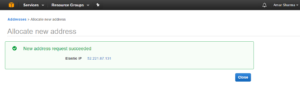
Step 20) Allocate a new Elastic IP Address.
- After allocating New Address you will see the success massage as show below.
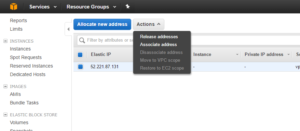
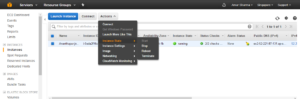
Step 21) Now assign this IP to your instance.
- Select the IP
- Click on Actions -> Associate Address
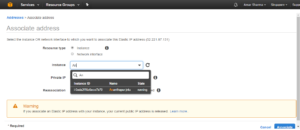
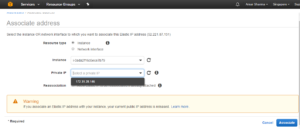
Step 22) In the next page,
- Search for your instance and
- Associate the IP to it.
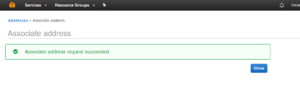
- After that,Click on the Associate button you can see the success message as shown below.
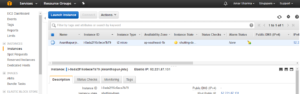
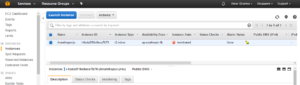
Step 23) Come back to your instances screen, you’ll see that your instance has received your EIP.
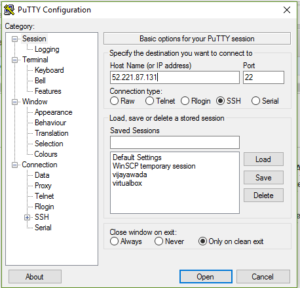
Step 24) Now open putty from your programs list and add your same EIP in there as below.
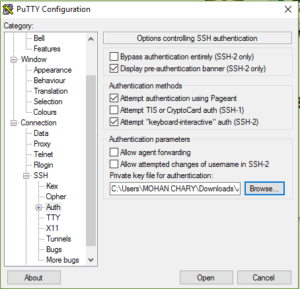
Step 25) In this step,
Add your private key in putty for secure connection
- Go to Auth
- Browse your private key in .ppk (putty private key) format
Once done click on “Open” button
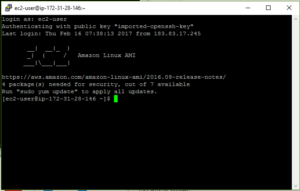
- Once you connect, you will successfully see the Linux prompt.
- Please note that the machine you are connecting from should be enabled on the instance Security Group for SSH (like in the steps above).
- Now you can see the Running instanses status is 1 in EC2 Dashboard is as shown below.
Step 26)
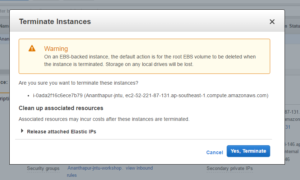
If you want to stop/close the instances select the left pane of EC2 Dashboard.
- click on Actions > Instance state >terminate/stop
- You will see like below image then click on the Yes,Terminate button.
- After clicking on that we can see like below images.
- Now see the EC2 Dashboard you shuld see the running instances is ‘0’.
